MAKE YOUR Possess WOVEN Cloth Carpet
.jpg)
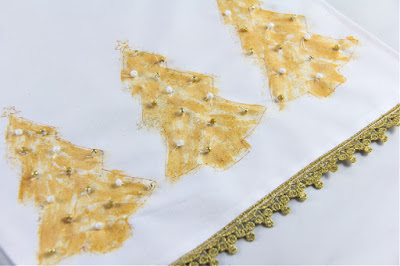
Anybody can make this woven cloth carpet, and it’s SO simple to customize it to be any measure, shape, or color you would like for your space.
I needed to form a woven cloth floor covering that was charming, woven, generally simple for a first-time carpet producer. After a bit of investigate, I found the idealize woven floor covering that fits all my needs!
XEM THÊM :
Sâm Lốc Online – Bí kíp chơi sâm lốc luôn thắng tại SODO
In the event that you've got a number of ancient bedsheets around, typically the culminate way to utilize them (and get an cute carpet out of the process).

Supplies:
-3 king-size level cotton bedsheets
-piece of cardboard (23″ x 43″)
–fabric scissors
–masking tape
-marker
–clear ruler

Step One: Utilize your ruler and marker to form a stamp each 2″ over the longest side of each of your bedsheets. Utilize texture scissors to form a 2″ cut at each mark.
.jpg)
Step Two: At each cut, tear the texture separated (it ought to tear equitably all the way over the sheet). Rehash this prepare until each sheet is tore into indeed strips. Isolated strips by color and pattern.

Step Three: On each of the brief closes of your cardboard, begin 2″ from each conclusion and check 2″ long lines each 1/2″. Utilize scissors to cut 2″ openings at each check.

Step Four: Accumulate three texture strips of different colors into a gather, overlap the gather in half longwise, and put one conclusion into the primary opening (it ought to hang over the edge some inches).
Put the other conclusion into the comparing spot on the inverse side. In case you've got a part of strings hanging off the sides of your strips, attempt and drag the huge clumps of strings off some time recently you put into the cardboard slots.
Rehash this prepare for each strip over the cardboard. It'll get pretty full after you have got a number of bunches set, but fair keep going until you're done.
.JPG)
Beginning around 2″ in from the conclusion of your cardboard openings, start to weave the weaving strip beneath and over each gather until you get to the other side.
Make beyond any doubt to take off a 6″ tail at your starting spot (you’ll protract this at the conclusion). Since the cardboard is so full, the primary push of weaving will be the hardest since it’s troublesome to tell one gather from another.
Fair do the finest you can—if you get many strips into the off-base bunch, it won’t make a distinction at the end.
Once you get to the other conclusion together with your weaving strip, make a U-turn by going over or beneath the final bunch (whichever is required depending on where you conclusion up), and weave your way back to the other side (it ought to be much less demanding this time).
As you wrap up each push, fix out the weaved strip together with your fingers and slide it as near to the push some time recently it as you can.
Rehash the weaving prepare until you’re approximately 2″ from the cardboard spaces on the other conclusion of the mat. Make beyond any doubt to pay consideration to the width of your mat as you go, and keep it as indeed as you can.
This sort of weaving gives you a part of control over your width since you'll be able basically fix or extricate your strip as you make the turn at each end.
When you get to the end of your weaving strip, you’ll want to join a new strip to the existing one so you can keep on weaving.
Cut a opening into the conclusion of your weaving strip and the starting of your unused strip, and drag an inch or two of your modern strip through the space on the existing strip.
Pass the tail conclusion of your modern strip through the opening on the unused strip and drag tight. Presently you've got a longer strip! Keep doing that each time you would like to amplify your weaving strip.

Step Six: To wrap up the closes, make a U-turn around the final bunch where your weaving finished, and string your weaving strip down through the primary uncovered area of your final push of weaving (see over photo).
Drag tight. Once more, cross over to the following uncovered weaving and string down through that area and drag tight. Proceed until you reach the conclusion
, and tie your weaving strip onto one of the strips within the final gather of strips.
Rehash prepare on the inverse conclusion (you’ll need to connect a strip to stretch the tail of your starting weaving strip first).

Step Seven: You’re nearly done! Fair put a ruler or a chunk of cardboard interior of where you need to trim your closes and utilize texture scissors to trim the abundance pieces. Once the ends are cut, you'll be able evacuate the cardboard backing.

Read Article:


Comments
Post a Comment